Thursday, 27 October 2011

Vintage patterns


A few weeks ago I bought some dress making patterns from a charity shop in town and what with one thing and another they remained tucked away in their bag by my sewing table and I have just found them.  They were a bargain price of 25p each and are probably both too small for me so will need a little adjustment, but I think they are lovely designs.


At the same time I bought a pair of fully lined curtains with a green and white flower pattern and I think I will use the fabric from these to make the button down dress on the left.  The curtains cost me £6 and being fully lined mean I have fabric for a dress lining too, a fully lined dress for six pounds can't be bad.

Curtain fabric and lining


Wednesday, 26 October 2011

Buttons for a bride

This weekend gone one of my closest friends got married, and I was a bridesmaid which was very exciting as I have never done it before.  Early on in planning her wedding she had seen some button bouquets online and thought they were lovely and asked me if I could recreate some for the bridesmaids.  Buttons also featured on the invitations and the cake.  Everything looked fantastic and the day went off wonderfully.

Button cake topper made by groom's sister-in-law
Button Cake made by groom's mother


 Here are the three bouquets I made, two for adult bridesmaids (me and her sister) and one smaller one for her husband's 6 year old niece.


I'm quite pleased with how they looked (and fortunately so was the bride!) and enjoyed making them so may be doing some more in future for other occasions.  I will put together a 'how I made' post later in the week.

Congratulations to the happy couple!

Centerpieces, flowers grown by bride's mother displayed in enamel tea pots and china cups

Friday, 21 October 2011

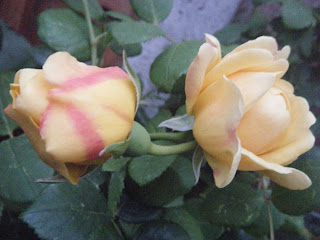
Yellow rose of Telford

Last year, shortly after we had moved into our new house and were attacking the garden with gusto, a friend gave me a yellow rose for my birthday.  It is a Charles Darwin rose from David Austin Roses and it is beautiful.

It resided in its pot last year as we still weren't sure how the garden was going and where it would best fit, so last year there were two small but wonderfully coloured roses.  Early in the spring I planted it into its new home and it has rewarded me with a constant supply of blooms.  There are not just flowers still on the plant but more buds yet to come.  A wonderful rose.


Tuesday, 18 October 2011

White bread

There is something incredibly self satisfying about making your own bread, and when it comes to indulgent (savoury) snacking I don't think anything can beat white bread still warm from the oven and layered in butter.  This is my favorite standard white bread recipe I make both loaves and rolls from this.  Please give it a try, dont be scared off, bread is really not that difficult and isn't even particularly time consuming if you have a mixer with dough hooks.  Give it a go, you know you want to!

You will need:
500g strong white bread flour
1tsp quick yeast
1/2tbsp sugar
1/2 tbsp lemon juice (helps keep the bread light and fluffy)
1 tbsp butter
1tsp vanilla essence (stops an overly strong taste of yeast)
400ml warm water

1. Add everything except the water to your mixer bowl, put in dough hooks and adding the water slowley start to mix.
2. Keep adding the water until the mix forms a soft dough, you may not need all 400ml, you may need a little more, depends on your flour.
3. Once a dough has formed leave the machine 'kneading' for a as long as it takes for the dough to be smooth and elastic looking.

4. Drizzle oil over the dough and turn it to coat, then cover the bowl with a clean cloth and leave it somewhere warm until the dough doubles in size.
5. Punch down the dough, knead lightly then shape into rolls or loaf tin, cover with cloth and leave 30min-hour until the dough is risen and puffy. I like to use Yorkshire pudding trays as it makes a nice size roll, and this mix does and nice bakers dozen of them.

6. Bake in a preheated oven (gas mark 6) for  until golden brown, the bread is done when a tap on the base gives a hollow sound.
7. See how long you can resist cutting open and serving with a slab of butter, it never lasts long!

Monday, 17 October 2011

Chocolate star biscuits

These delicious biscuits are also quite decorative so good for an occasion, I tend to make them around Christmas time as the decorated stars seem quite festive.

You will need:
175g plain flour
25g cocoa
100g caster sugar (I use golden as I prefer the taste)
100g unsalted butter
50g dark chocolate
50g milk chocolate
50ml double cream
100g icing sugar

1. Measure flour, cocoa, sugar and butter into food processor and pulse until combined.

2. Add 4-6 tablespoons of cold water and pulse again to form a soft dough
3. Form the dough into two discs, wrap in clingfilm and chill in the fridge for at least 30mins

4. Roll out the dough on a floured surface to desired thickness and cut out star (or alternative) shapes.
5. Place shapes on a greasproof papered baking tray and bake in the oven at gas mark 5 for 10-15 mins (I like to cook mine for just 10 mins to leave then quite soft in the middle) then allow to cool

6. Melt chocolate then remove from heat and gently stir in cream until smooth
7. Put a generous blob of the chocolate cream on half the stars and top with another star to make a sandwich.  Allow these to set.

8. Mix the icing sugar with 1-2 tsp of cold water and pipe in zigzags across the stars
9. Repeat this piping with the chocolate filling.


10. Eat and enjoy!

Sunday, 16 October 2011

National Baking Week

Starting tomorrow it is national baking week, with the theme this year of bake and share.  Share you recipies, share your baking time and share the goodies you produce!  There is lots more information on the national baking week website, including recipes and competitions.

With that in mind I shall be sharing some of my favourite baking recipes here over the next week, and sharing the results with my friends, family and colleagues.  In preparation for this and to mark the beginning of national baking week I sorted out my baking cupboard this afternoon, a task that has been needed for a very long time!

Three hours later!
Before


Due to the scale of the task it took ages, but it did give me a good opportunity to start listening to Terry Pratchett's latest Vimes adventure 'Snuff' which I downloaded from audible this weekend.  I am a big fan of Pratchett's writing, in particular the Discworld with Sam Vimes being one of my favourite characters and so far (three hours in, yes the cupboard was that messy!) it does not disappoint, I cant wait to listen to the rest, perhaps I will sort out the airing cupboard this week!

Thursday, 13 October 2011

Bath bombs away!

The Rangers are hoping to go on a joint scout and guide camp next year being held at Shrewsbury, so we are planning in lots of fundraising activities for them to do to help with costs.  One of these is having a stall at the Christmas fayre of the church where we meet.

We are trying out a number of crafts to make Christmas gifts for the stall and this week we made bath bombs.  There are lots of different recipes for these out there online and in books, but this is the method we used, which had been put together from several sources with the key factor being that ingredients were easy to find and relatively cheap.

You need:
4 parts Bicarbonate of soda
1 part cream of tartar
Essential oil in fragrance of choice
Food colouring if desired
Vegetable oil
Decorations if wanted
Metal or ceramic bowl - you can use plastic but it will absorb the fragrance so will be no good for food use afterwards.
Metal spoon - again you can use plastic or wooden but it will absorb the fragrance.


  • Mix the bicarbonate of soda with the cream of tartar, this needs to be mixed really well so it is even throughout.
  • Add the food colouring if you are using some, we used powdered and paste colorants as I had some in the cupboard and it keeps the mix dry which stops it fizzing before you want, but many of the recipes around use liquid colouring, I just wouldn’t add too much!
  • Add your fragrance, we used lavender essence for one 'flavour' and we have tried a 'winter spice' fragrance by using ground ginger and ground cinnamon.
  • Stir the mix thoroughly to make sure colour and fragrance are even throughout.
  • Add the vegetable oil a little at a time and mix in completely until the mix begins to stick together
  • spoon the mix into biscuit cutter shapes and press down firmly to compact, add some decoration to the top if you like, we used purple sugar glitter on the lavender bombs and a star anise on the winter spice.
  • Leave on a tray until completely dry (this took ours a couple of days but the mix was a little too damp!) 

A selection of the finished product

Wednesday, 12 October 2011

A waistcoat for a bear

At the beginning of term we took the Brownies to Build-a-Bear as a special treat.  It was a great evening, lots of fun and the staff were fantastic at keeping the girls happy and entertained.  For anyone not familiar with the build a bear concept they have lots of different 'skins' of cuddly toys; bears, dogs, rabbits. cats etc. you pick a skin and take it to the the filling machine where it gets filled with stuffing, more or less stuffing depending on how soft or rigid you want the finished bear to be.  Then you pick a cloth heart from a jar, give it a kiss and make a wish and that goes inside your bear which is then sewn up and ready for brushing and to choose clothes for if you want too.  We each made a bear (or dog, or cat...) and some chose clothes and accessories as extras.

My 'bear' - Baden Pawell
We have then planned in lots of 'bear themed' activities for this term to make the most out of the build-a-bear experience, finishing up with a teddy bears picnic where some of the girls will take their promise.  The most recent of these bear activities was making waistcoats for our bears.  After our last experience of sewing with the Brownies (very difficult) we decided to make the waistcoats as simple as possible.  One piece of felt cut to shape and blanket stitched round the edge, it worked really well.  All of the girls managed the blanket stitch and some were really really good!

Baden Pawell in his new waistcoat
The build-a-bears are all a standard size which made making the waistcoats easy as we didn't have to worry about dogs being different to bears, being different to cats.  The template we made for the waistcoat is below (one half, cut on the fold), if you print it full size on A4 it will be the right size.  It's a nice simple craft to do with children for their bear.  Hope you enjoy!

Sunday, 9 October 2011

Rosehip syrup

We moved into our house last year and in the garden was a wonderful old rambling rose with a scary arsenal of thorns. The flowers are very pretty but I was particularly excited when later in the year it displayed a huge amount of brilliantly scarlet hips. Great, thought I, I'll make rosehip syrup. However instead of actually making the syrup, I just thought about it every time I looked at the plant, and before long the hips had gone.

I was determined that this year I would not make the same mistake and although I really have left it a little too late and half the rosehips are wrinkled and split, today I finally picked the lovely red hips and made rosehip syrup for the first time.


I used a recipe from 'Wild garlic, gooseberries .. and me' by Dennis Cotter, although the premise is simple, boil the hips in water, strain, repeat and then boil the juice with sugar, but I love this book. It has wonderful stories to accompany tasty recipes and the photos make everything look divine, it also has a great chapter on 'wild pickings' for whence the rosehip syrup came.

So I blitzed the rosehips in the blender, boiled up the resulting mush;


strained through some muslin, added my sugar and I was done!

I was quite surprised by the taste, not sure what I was expecting but it is so similar to quince jelly with a bit more of a flowery taste. Now just have to figure out some nice ways of eating it!

Saturday, 8 October 2011

Apples and More

Today my mum and I went to the Apple Day at the Green Wood Trust in Ironbridge, there was apple juice freshly pressed from a big hand press, apple varieties to try and buy trees, bird feeders made from apples, hog roast (with apple sauce, obviously), locally made cider, and lots more apple themed and other.  It was a nice afternoon out in lovely surroundings and I bought home some amazing apple juice, mum says they have a press in the garage that my dad made years ago so we may have a go at pressing some juice of our own.

I am very interested in apples at the moment.  There are a couple of apple trees in my Grandma's garden that have been there years (no idea what variety they are), the apples are nice enough to eat but nothing particularly special, until you cook them.  My Grampy used to make the most amazing apple pie, I have never tasted anything like it, the taste was sweet and warm and vanillary and the apples were very slightly pink.  I always thought it was some secret ingredient or cookery tip, until last year.  There was a heavy crop of apples on the trees, Grandma was giving lots away and I had a bag full so I made some pies.  It was just like grampy used to make, pink tint and all, not a secret ingredient after all but a magic apple!  So this year I am sending some of the apples off to Brogdale farm home of the national fruit collection to try and get them identified, in the hope of finding out just what the magic apple is.  I am also planning to try some grafting from the trees so I can have them in my garden.

I have never done any grafting before so have been reading any guides/tutorials I can find, but if anyone has any practical experience or tips for beginners to share I would appreciate it.  From everything I've read I need to wait until the trees are completely dormant to take cuttings to graft so I will let you know how that goes later in the year!
Related Posts Plugin for WordPress, Blogger...